Skip to content
RTILA Web Business Automation
  • Home
  • Features
  • Pricing
  • Marketplace
  • Support
    • Documentation

Cart

RTILA Web Business Automation
  • Home
  • Features
  • Pricing
  • Marketplace
  • Support
    • Documentation
Free Download
Free Download

Billing & Licensing

10
  • Change License’s registered email address
  • Upgrade a License
  • Manage License Activation Count
  • RTILA Studio local database
  • Standalone Exe Antivirus False Positive Alert
  • Team Member Activation URL & License
  • AppSumo Codes Redemption
  • Download & Activate RTILA Studio
  • AppSumo Code Stacking & Upgrade
  • Mac OS Installation Warning

Custom Commands

36
  • WordPress Posts via API (beta)
  • Webhook Send Request
  • Target Text Before After
  • Download File to Folder
  • Clipboard Copy & Paste
  • ChatGPT API Full Control
  • Generate Random Numbers and Text
  • Regex & JS Filters
  • API Bridge Get Post Requests
  • WhatsApp API send MSG
  • GET HTML
  • Slack Notification Command
  • Target Elements With Text Value
  • Directory Get Files Path
  • Folder and File Monitoring
  • Get iFrame URL
  • Get File Content
  • Verify License Easy Digital Downloads
  • Save Variable to File
  • Rename File
  • Move File to New Directory
  • Delete File
  • Mouse Events
  • Get System Info
  • Airtable Get & Update Records
  • Email Send Via SMTP
  • Wait For Element to disappear
  • OCR Passport Reader
  • Target Element in Shadow Dom
  • Airtable Get Records
  • Airtable Update Records
  • Sanitize URL
  • Email Verification
  • Get Hardware ID HWID
  • Timestamp Unix and UTC
  • Switch Tab Focus Command

How-To & Tutorials

42
  • How to target a CSS element
  • Change default Browser
  • Export Results to a CSV file
  • Profile Session Feature
  • OCR Feature: read text from images
  • Auto Download Pinterest Images
  • Save current URL using JavaScript
  • Search & Filter Projects
  • Error handling Strategy
  • Working with Arrays and Objects in RTILA
  • Auto Comment On WordPress Posts
  • Run Automations in Silent Mode
  • License Check for Standalone Executables
  • Trigger Standalone Bots via Command lines
  • How To Find Custom Collections For List type Datasets
  • Correcting & Completing Auto-Recorder Commands
  • RTILA WordPress Plugin installation & configuration
  • Using Developer Tools In RTILA Studio
  • Create A Project From Scratch
  • Bring back disappearing commands & properties
  • Export & share an RTILA project file
  • Install Browser Extensions using Profile Session
  • How To Fill a Form Using Generic Form Filler Child-Project
  • Project Settings: Import URLs manual entry, From File, From Project, and Read XML Sitemap
  • Project Settings: Import URLs manual entry
  • Use Local Storage Variable to scrape Do-follow Links
  • Schedule Launch of Automations
  • Email Results File via Gmail
  • Read from Google Sheets & Post on WordPress
  • Website Load Testing Automation
  • Read data from a txt or csv file
  • Downloading files
  • Open in a New tab
  • Using filters to complete a URL
  • Choosing the right collection
  • Set a Counter with JavaScript
  • Setup reCAPTCHA Resolution
  • Woo Categories & ChatGPT API
  • Login to Google Account & share profile session
  • Google Search Baby Steps
  • Auto-Recorder as a 1st step
  • Standalone Executable Bots

Official Commands

58
  • List Command
  • Incogniton Anti-detect browser
  • Save results to file command
  • RTILA Cloud API Documentation
  • FTP / SFTP Command
  • Custom Commands
  • Integrations
  • RPA & Desktop OS Commands
  • Add And Configure Dataset Properties
  • Inspection Panel Interface & Elements
  • Config & binaries files for Standalone
  • Focus On Element Command
  • Go To Url Command
  • Scroll Element Command
  • Execute JavaScript Code command
  • Reload Page Command
  • Compare Variables Condition
  • Take Screenshot Command
  • Smart Variable (ChatGPT API)
  • Child Projects
  • Confirm (Dialog Box) Command
  • Populate Text Field Command
  • Hover Mouse On Element Command
  • Download Page Command
  • Stop Automation Command
  • Log Message Command
  • Input (prompt box) Variable
  • Extract Results Command
  • Wait for Element to Appear Command
  • Selector (DOM element)
  • Check Radio Input Command
  • Dynamic Variable (JavaScript Code)
  • Static Variables
  • Set Checkbox State Command
  • Set Dropdown Value Command
  • Press a Keyboard Key Command
  • Upload File Command
  • Double Click On An Element Event
  • Click On An Element Event
  • Switch Browser Identity Command
  • Slack Notification Command
  • Save as Pdf Command
  • Go Back To Previous Page Command
  • Go Forward To Next Page Command
  • Proxies Built-In Rotation
  • External Proxy Rotation API
  • Regular Expressions
  • Mock Location Command
  • Close Page Command
  • Desktop Notification Command
  • Command Folder
  • Clear Cookie Command
  • Change Page Size Command
  • Break Loop Command
  • DataSet Types
  • Link Crawler Command
  • Alert Message Command
  • Wait Commands
  • Home
  • Docs
  • Official Commands
  • Child Projects
View Categories

Child Projects

2 min read

Definition #

A Child Project is a sort of mini automation project which only loads the commands and properties that have been saved within it. This allows you to save time by creating multiple Child Projects that would contain your most used sequences of commands and or set of properties. For instance you can have a Child Project for a WooCommerce Admin Login sequence. Or you can have a Child Project for a series of the most used data properties such as: First Name, Last Name, Email, Phone, LinkedIn URL. A Child Project will not impact the receiving project settings, it will only load the new commands and or new properties into a new section.

Activate Child Project option #

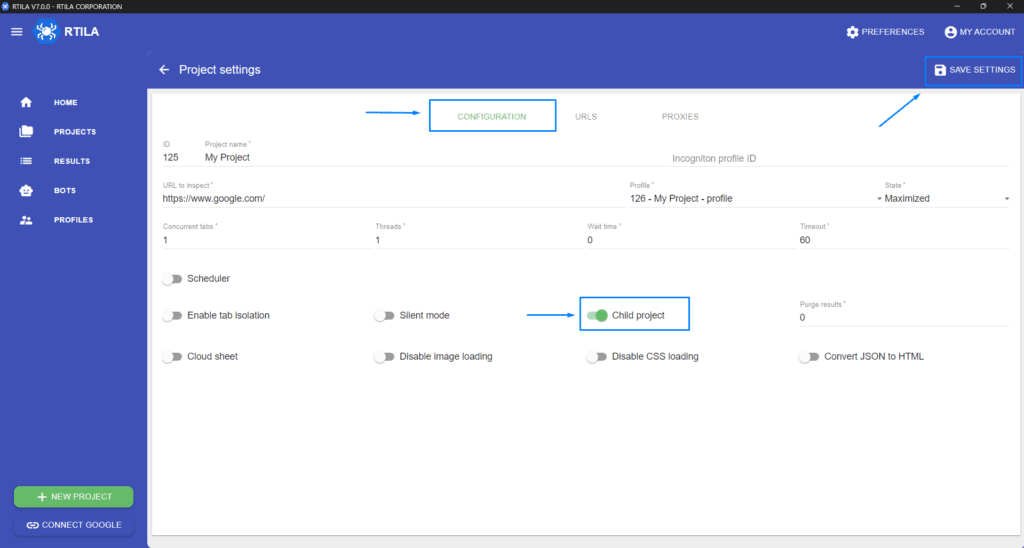
Before you can start importing Child Projects into an existing Project you need first to activate this option from the Settings of the concerned project, see the screenshot below. Make sure you click on SAVE ALL SETTINGS after activating the Child Project option.

Import Automation Blocks from Child Project #

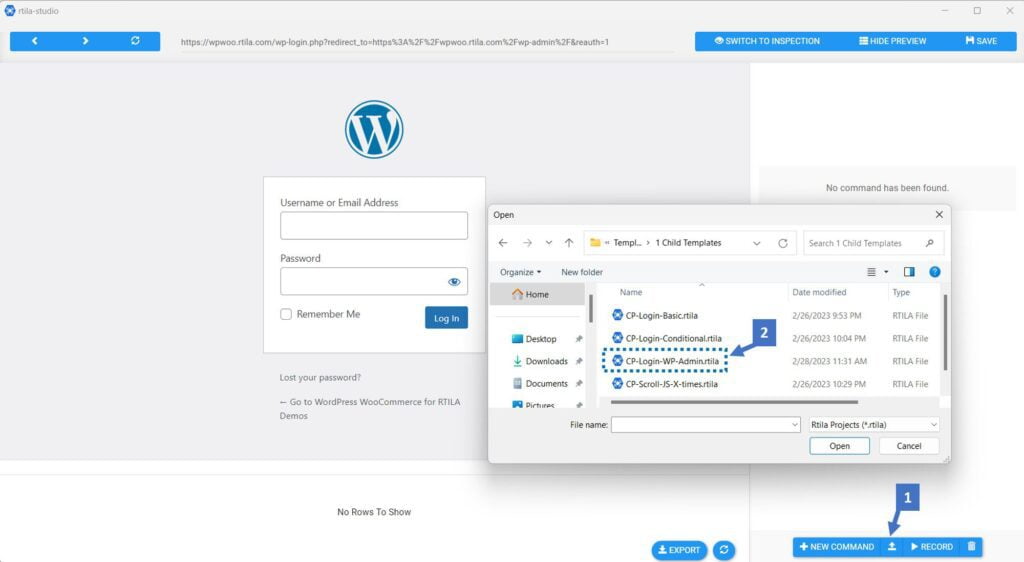
Once the Child Project is activated, it will display a small Icon (point 1) in your Automation Panel for you to click and select the Child project you wish to import (point 2). In this example we are going to import our Child Project with the WordPress Login Commands sequence.

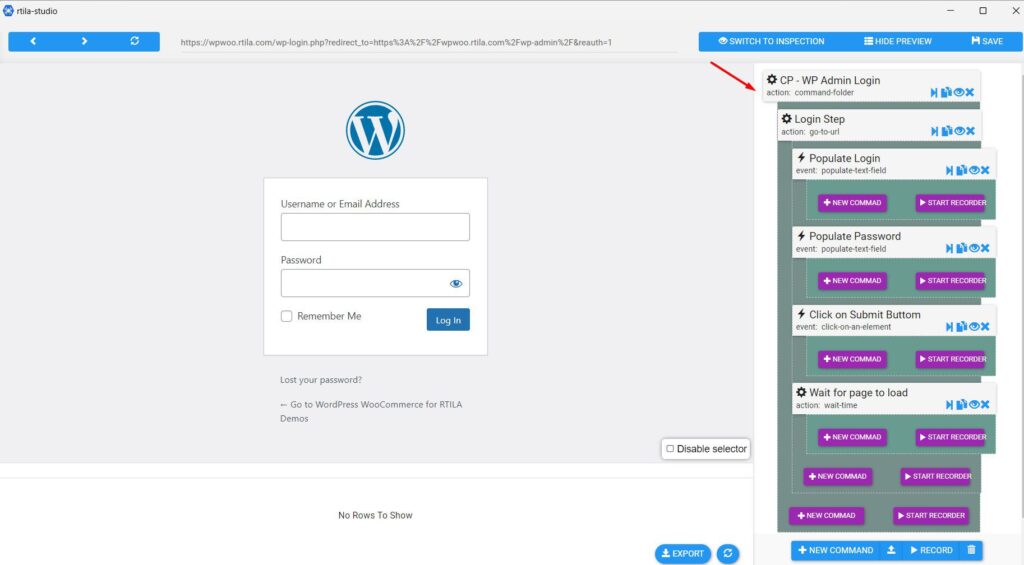
Once the Child Project Imported it will create a new Command Folder with all the Commands that are specific to WordPress admin login form, and you may just replace you credentials and get going. See below how the command blocks are populated into a project that was initially empty.

Import DataSet Properties from Child Project #

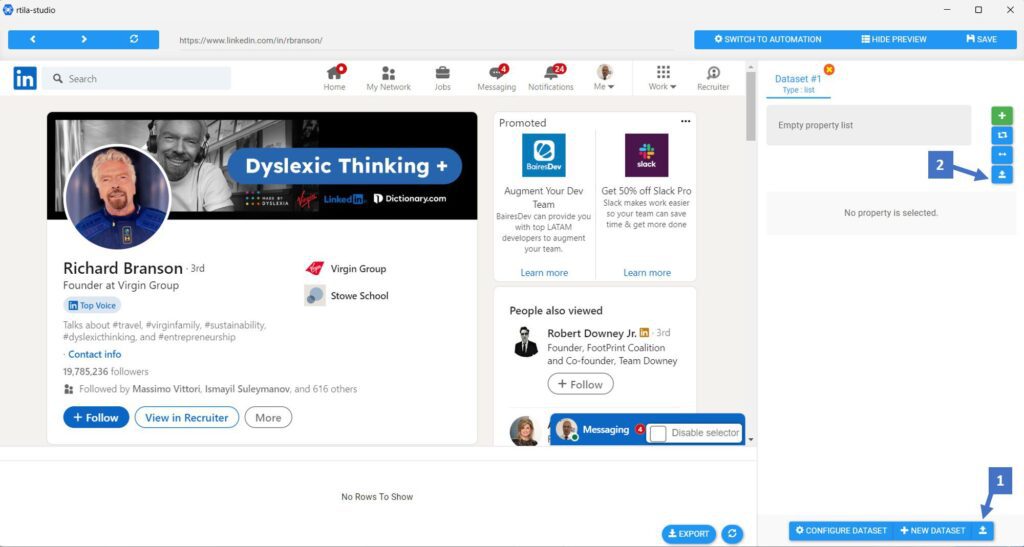
Likewise in the Prospection Panel side, you can import a whole DataSet or just a series of pre-populated Data Properties. On the prospection side we offer 2 ways to import a Chile Project. Using the option 1 it will create a new DataSet with all the properties that are part of it. Using Option 2 will add new properties into your existing DataSet. See below a screenshot of the 2 points from where you can import properties.

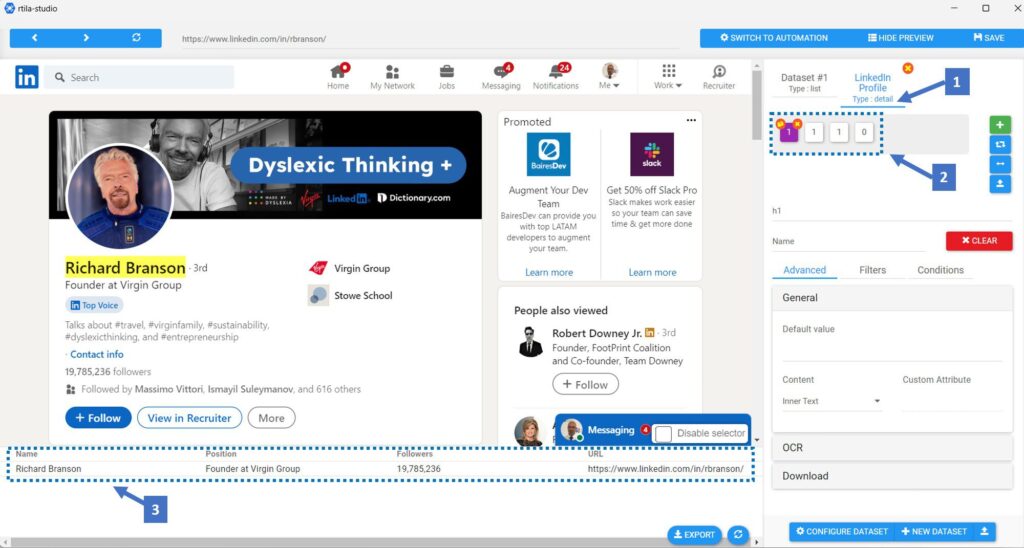
In this example we will use the option 1, whereby we will import a whole new DataSet with its properties and its settings. For instance here the DataSet we will import from the Child Project will already contain the properties we need to catch the data of a LinkedIn Profile, but also the DataSet setting will be set as a Detail type.

As you can see below, a new DataSet has been created beside the existing DataSet, a new DataSet named LinkedIn Profile has been created and configured as Detail type (point 1). The new DataSet contains 4 pre-configured properties to catch the data we are interested in (point 2). And you can see that the Data is instantly captured in the results table (point 3). As you can see this can save a lot of time and you can adapt, edit and create DataSet and Properties Child Projects for all your target data sources and call them at will in your different automations.

How to create a Child Project #

Creating a Child Project is exactly the same as exporting an Automation project. Just create the automation blocks inside a Command Folder and then export the project as a .rtila file. For the DataSet and Properties it works the same, you create and configure them then export the project as a .rtila file. Note that the same Child Project can contain both Automation Commands as well as DataSet and Properties.

Where to find existing Child Projects #

Child Projects are available in the same place as our Public Templates. They often start with the acronym CP (Child Project) or CT (Child Template). For example the Child Project for WooCommerce Admin Login flow is named: CP-Login-WP-Admin.rtila

    Still stuck? How can we help?

    How can we help?

    Updated on 02/10/2024
    Smart Variable (ChatGPT API)Confirm (Dialog Box) Command

    Powered by BetterDocs

    Table of Contents
    • Definition
    • Activate Child Project option
    • Import Automation Blocks from Child Project
    • Import DataSet Properties from Child Project
    • How to create a Child Project
    • Where to find existing Child Projects

    INFO & LEGALS

    PRICING
    PAYMENTS & REFUND
    COOKIES - PRIVACY
    LICENSE AGREEMENT

    DOWNLOADS

    BOT LAUNCHER
    RTILA STUDIO ON GITHUB
    BOT & TEMPLATES
    PARTNERSHIPS

    RESOURCES

    VIDEO TUTORIALS
    DOCUMENTATION
    SUPPORT PORTAL
    FB COMMUNITY SUPPORT

    stay in touch

    Subscription Form

    follow us on

    • Facebook
    • YouTube
    • RTILA LinkedIn Page
    Copyright © RTILA CORPORATION