Use Case #
Using a Generic form filler from a child project is the idea of using a preconfigured form filler that takes common CSS input field selectors. These form fillers are meant to work with most site forms that have similar input field attributes or tags, so the approach is to use CSS locators that can include the different tags/attributes that an input field may have. Just like most forms have a “First Name “, a “Last Name “, and an “Email” input field, these input fields mostly contain the same attributes in many different forms. Therefore, This would act like using a ” Smart” CSS field identification CSS locator.
How To Use Form Filler Child-Projects #
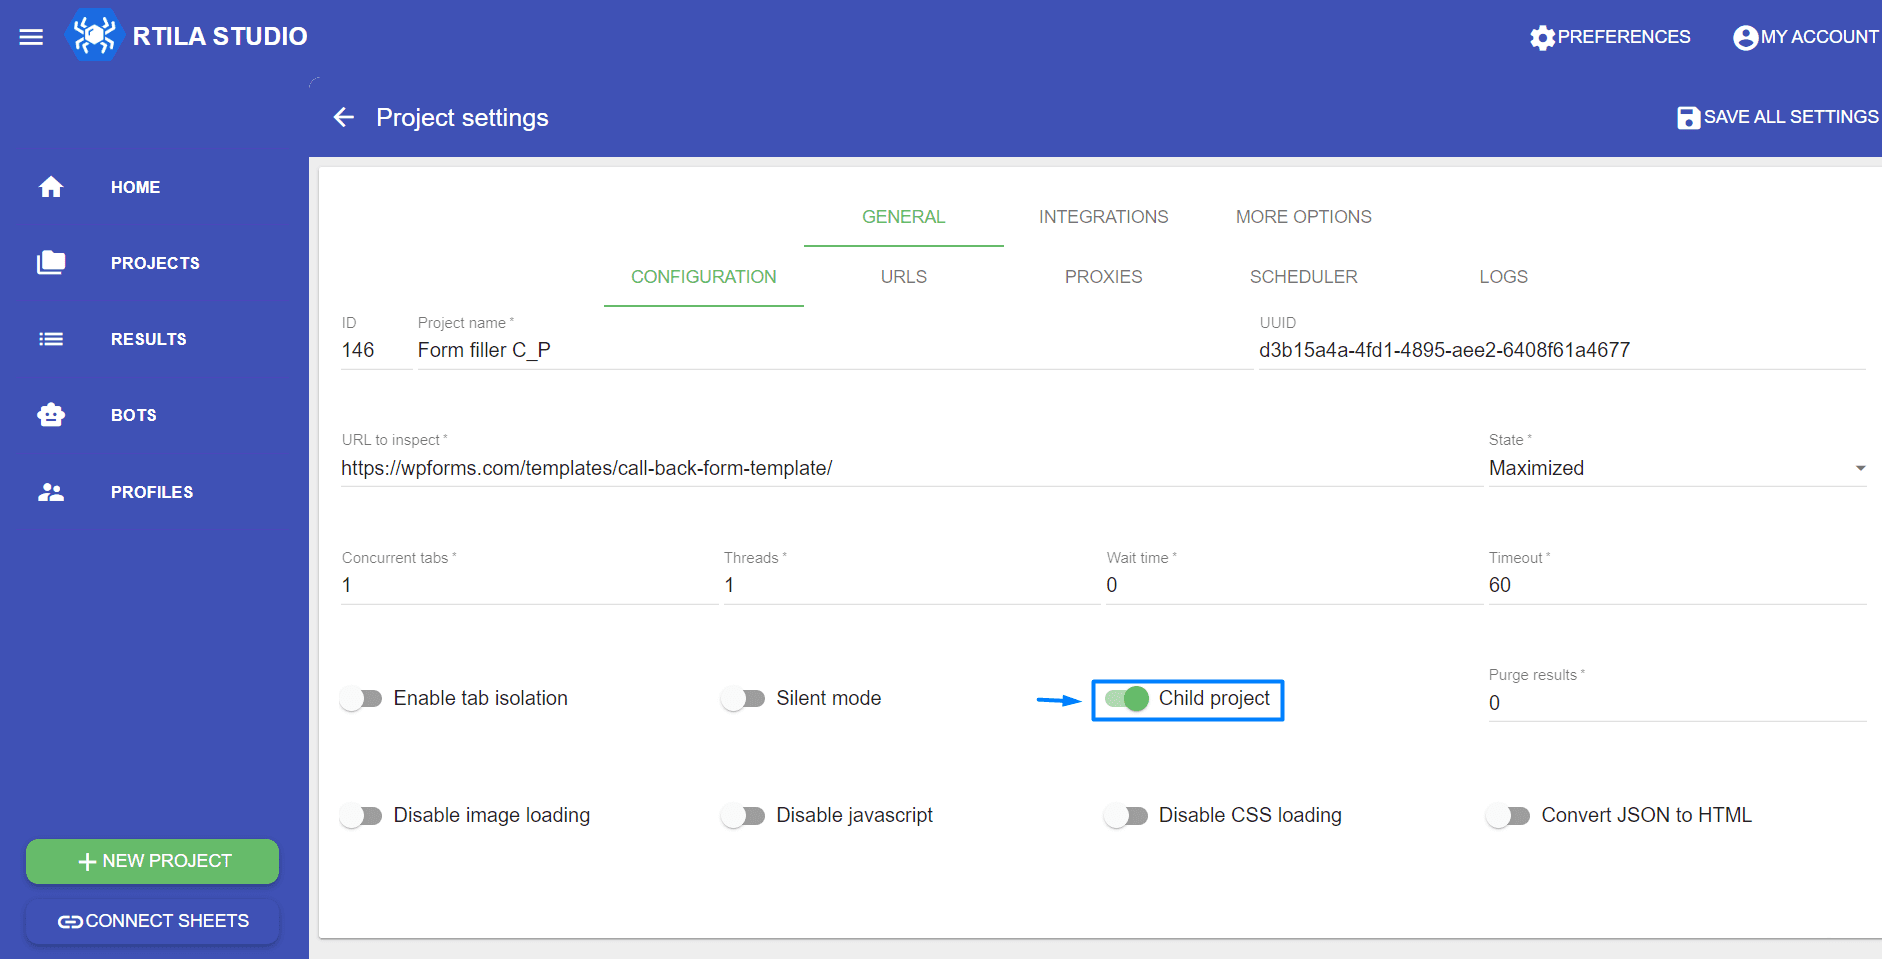
In order to use these form templates, you can enable the child project feature from the project settings. Once you have enabled it, you can call the form filler child project template and use its preconfigured commands with preconfigured values without having to create each input command with the same values repeatedly.
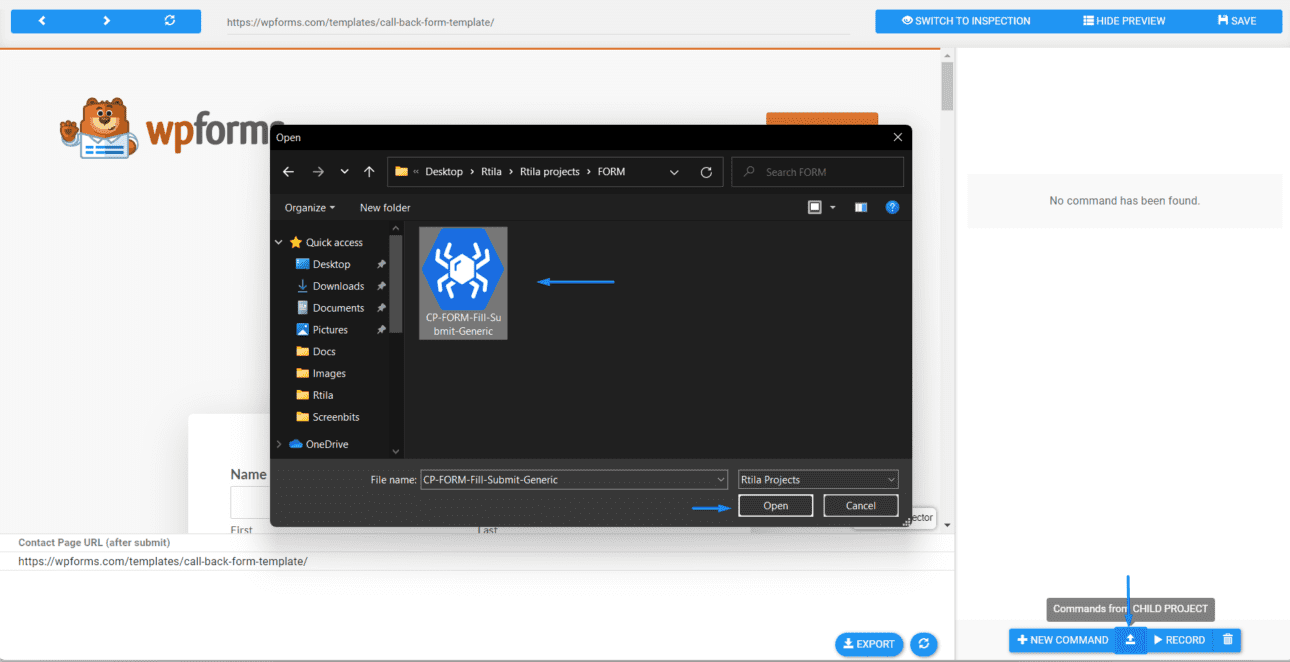

You can see the commands we have imported from the form filler child project and how they were used to fill the input fields of the form as if we created these commands from scratch and specifically for the shown form. This shows how easy it could get using these form fillers could be and how it could save some time in creating such commands that could easily be imported using these templates
Input Field Smart CSS Selector #
As mentioned earlier, the approach to making the preconfigured form-filler templates is to choose an input field CSS selector that contains different tags and attributes, this CSS locator would have multiple and slightly different tags CSS selector combined, then when a form input field is found with one of CSS locators that is similar to the preconfigured input field with “Smart” CSS selectors, that input field would be selected automatically and the preconfigured value would be inputted to that form input field. This is a very helpful technique that can help you set a ” Form-fillers” template on your own for forms that you constantly work with, so you won’t have to manually enter each data repeatedly.
Smart CSS Selector Example For Common “First Name” Input Field #
Here is an example of creating a smart CSS selector for the commonly encountered “First Name” input field. As you can see in this CSS selector there are multiple different CSS locators with slightly different attributes and tags separated by a comma, these different CSS locators can include the ones used in many website forms with the ” First Name “input field.
input[type="text"][id*="name" i], input[type="text"][placeholder*="name" i], input[type="text"][class*="name" i], input[type="text"][name*="name" i], input[type="text"][aria-label*="name" i]Here is a detailed explanation of the previous CSS selector :
This CSS selector targets all input elements of type=”text” that have certain attributes that contain the string “name” in a case-insensitive manner. Specifically, it targets input elements that meet any of the following conditions:
- id attribute contains the string “name”
- placeholder attribute contains the string “name”
- the class attribute contains the string “name”
- the name attribute contains the string “name”
- the aria-label attribute contains the string “name”
The *= selector checks for the presence of the specified string in any part of the attribute value. The “I” flag at the end of each attribute selector indicates that the search should not be case-insensitive, meaning that it will match strings regardless of whether they use uppercase or lowercase letters.
So, the entire selector targets any element with a <type> attribute of text that has an “id”, “placeholder”, “class”, “name”, or “aria-label” containing the substring “name”.
Exclude Certain Tags and Attribute from CSS Selector #
In some cases, we might need to tell the CSS selector to exclude some tags and words from a certain input field, this can be done by using this format “: not([attribute=what-i-do-not-want-to-target])”. This is helpful to ignore the input field with such tags and attributes and give the CSS selector a better chance of finding the correct element.
Here is an example of using the “Description” input field smart CSS selector and setting it to exclude some tags and attributes as explained after the code snippet
input[type="text"]:not(textarea):not([id*="name" i]):not([placeholder*="name" i]):not([class*="name" i]):not([name*="name" i]):not([aria-label*="name" i]):not([type="email"]), input[inputmode="text"]:not([id*="name" i]):not([placeholder*="name" i]):not([class*="name" i]):not([name*="name" i]):not([aria-label*="name" i]):not([type="email"])This CSS selector targets all elements with a <type> attribute set to “text” or an ‘input mode ‘ attribute set to “text”, except for those that are elements or have an ‘id’, ‘placeholder’, ‘class’, ‘name’, ‘aria-label’, or <type> attribute containing the string “name” or have a type attribute set to “email”.
- The input[type=”text”] and input[inputmode=”text”] selectors target <input> elements with type=”text” and inputmode=”text”, respectively.
- The ‘: not(textarea)’ selector excludes <textarea> elements from the selection
- The ‘: not([id*=” name” i])’, ‘: not([placeholder*=” name” i])’, ‘: not([class*=” name” i])’,’: not([name*=” name” i])’,’: not([aria-label*=”name” i])’, and ‘: not([type=”email”])’ selectors exclude elements that have an ‘id’, ‘placeholder,’ ‘class’, ‘name’, ‘aria-label’, or <type >attribute containing the string “name” or have a type attribute set to “email”.
- The ‘*=’ selector matches any part of the attribute value, while the ‘I’ flag makes the match not case-insensitive. The ‘: not()’ selector excludes elements that match the given selector.
Form-Filler Template In Action #
Here is an example of a form-filler template used in a form web page to fill the input field using the preconfigured command with the ‘smart’ CSS selector for each input field, you can see how the CSS selector works and selected the right input field and inputs the value that has been added to the commands in the form-filler child project template.