In this documentation , we will be creating a project in RTILA Studio from scratch and showing the basic configurations of RTILA projects
Create a New Project #
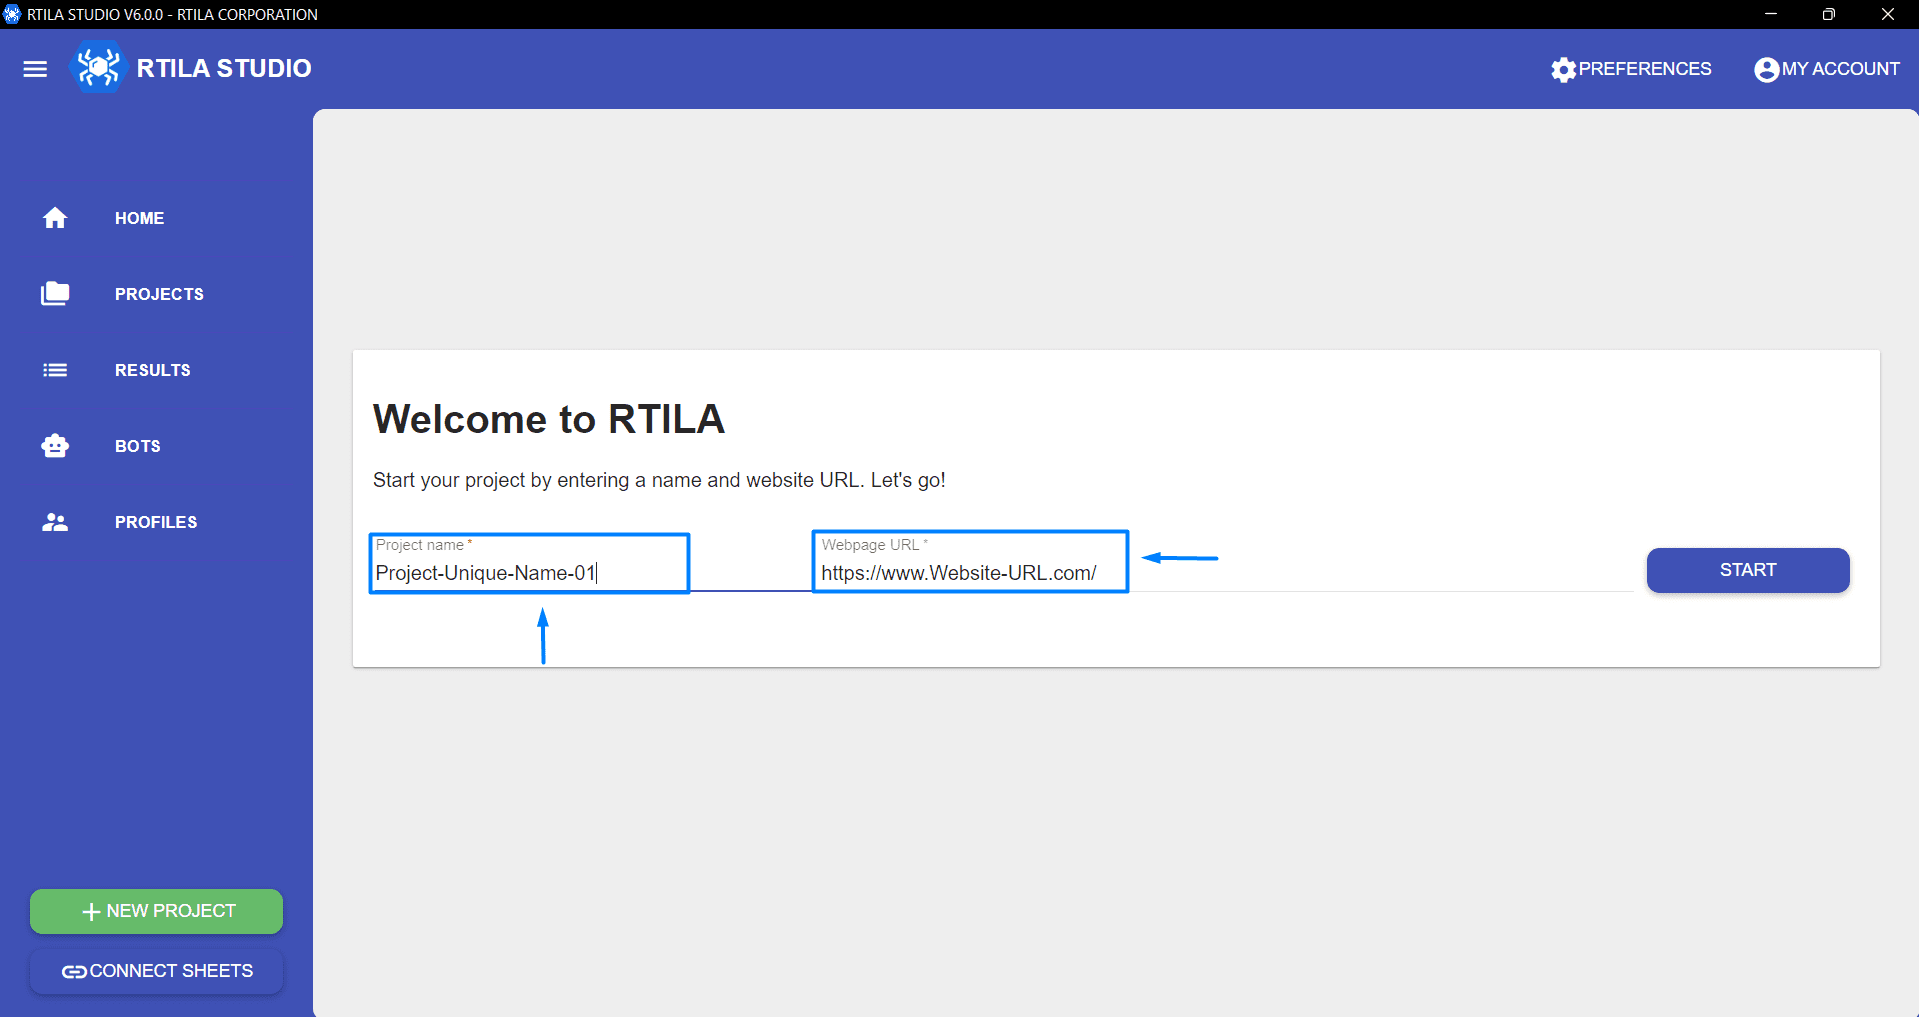
to create a new project in RTILA , all you have to do is to head to the “Home” tab and set :
- A unique name to your project to avoid conflict with other projects.
- Webpage URL in which you want to start your automation in ( In case you don’t have a starting webpage of your project , you can just leave it to “https://www.google.com/” then use the “Go To URL ” command )

Get Familiar With The Project Interface #
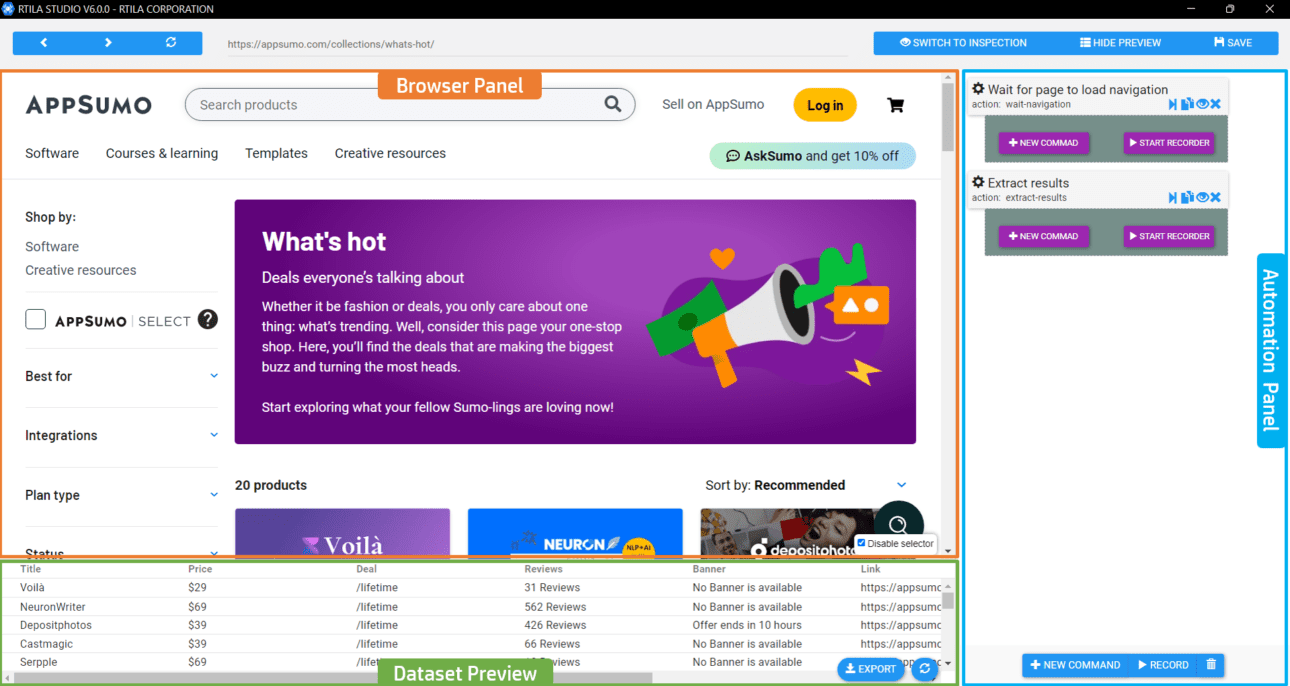
Once you have created your project , you can now start creating your automation project . There are few main elements in the project interface that could help get all you need from Web Automation . As you can see in the project interface there are three main panels :
- The Browser Panel : This is the area where the webpages are previewed and used to inspect the elements of your automation project
- The Automation Panel : This is where the work is done , In this panel you can add and configure the Datasets and Automation Commands of your project
- The Dataset Preview Panel : Here you can have preview of the project’s datasets and make sure you have selected the right CSS selectors that represent the correct data you need to extract .

Project Interface Basic Elements #
Now that you became more familiar with the interface , there are some elements in each panel that will be explained in this section .
New Command #
The new command button allows you to open the new command interface and select the command you want to add to your automation project
Record #
The record button creates a set of commands based on your interactions on the browsers panel, it records each action made in the browser and creates the automation commands for each interaction. Look at the example below to better understand how the record feature works
Switch To Inspection & Switch to Automation #
This button allows you t switch the Automation panel between the inspection panel that is used to create datasets and control results and the automation panel that used to create automation commands
Hide & Show Preview #
With this button, you can either choose to hide the preview Button to get more space for the Browser Panel or show the Preview Panel to work with the datasets and check their properties values