Use case #
For those who are interesting in testing the load capacity of their website and or web hosting infrastructure without breaking the bank, we have developed a Public Template and documentation on how to automate and test the TTFB (Time To First Byte) and the Fully Loaded Time (FLT) in milliseconds for a website of your choice. For our example we will do the Load test on WordPress.com
Specify the source of URLs to test #
For this example we are using the sitemap of WordPress.com to crawl through a number of pages and open them simultaneously. This automation can be modified to open the same URL multiple times, or load a specific list of URLS from a csv file for instance. See below where to modify the URL of the WordPress website sitemap that we are using in our demo/test.

Configure the number of concurrent tabs #
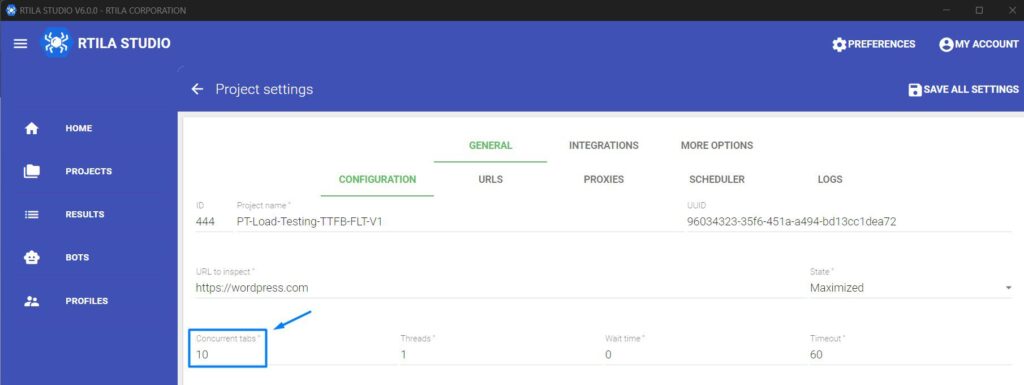
Before starting you can configure the number of concurrent connections you want to have. We advise to start with 10 concurrent tabs and increase slowly if the website is able to hold that traffic. You can change this value from the Project Settings see below screenshot.
JavaScript to load before opening the browser #
In this case of testing the loading time, we need to be able to initiate our measurement of response time before or at the very start of the connection to the website. For this reason we are using a JavaScript code that is added in the project settings so that this code is executed before opening each URL to initiate the measurement variables, and then during the automation run our variable commands will catch back the results of those measurements. Follow the screenshot below to find out where to place the JavaScript in the project settings
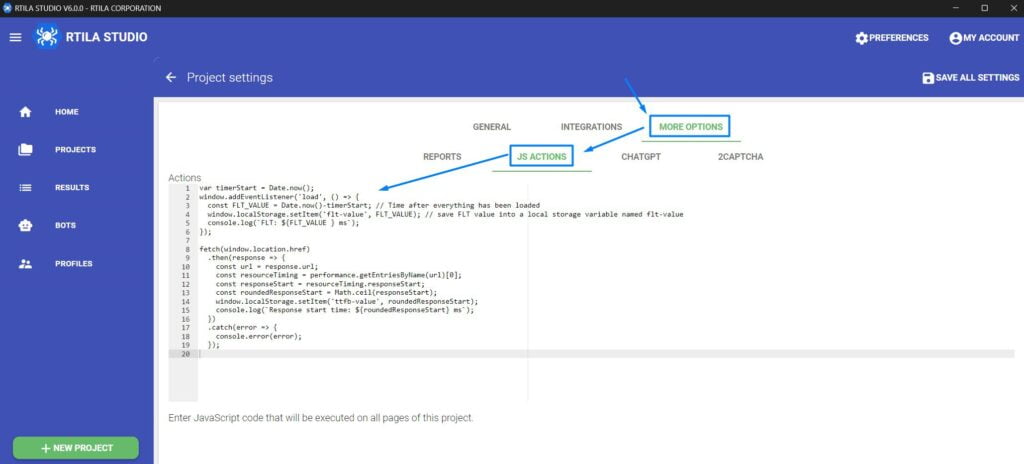
Below is the code we use at the project settings level, so that you can modify, improve or learn from it.
var timerStart = Date.now();
window.addEventListener('load', () => {
  const FLT_VALUE = Date.now()-timerStart; // Time after everything has been loaded
  window.localStorage.setItem('flt-value', FLT_VALUE); // save FLT value into a local storage variable named flt-value
  console.log(`FLT: ${FLT_VALUE } ms`);
});

fetch(window.location.href)
  .then(response => {
    const url = response.url;
    const resourceTiming = performance.getEntriesByName(url)[0];
    const responseStart = resourceTiming.responseStart;
    const roundedResponseStart = Math.ceil(responseStart);
    window.localStorage.setItem('ttfb-value', roundedResponseStart);
    console.log(`Response start time: ${roundedResponseStart} ms`);
  })
  .catch(error => {
    console.error(error);
  });
Variable Commands used to catch the measurements #
On the Automation Panel side, we are calling a number of Variable Commands and saving the time spent between the moment the variable was initiated (from Project setting JavaScript code execution) and the moment the Variable Command is called.
Within a Dynamic Variable command we are catching the result from the local storage variable flt-value which was initiated at project settings level before the launch of the browser. See below the JavaScript code used to catch this value.
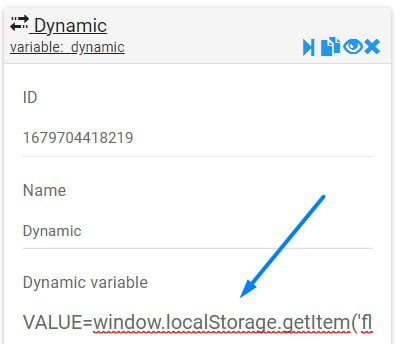
VALUE=window.localStorage.getItem('flt-value');Then we do the same with a second Dynamic Variable command which we have named Dynamic-ttfb and which uses the JavaScript below to catch the local storage variable for the TTFB, see code below.
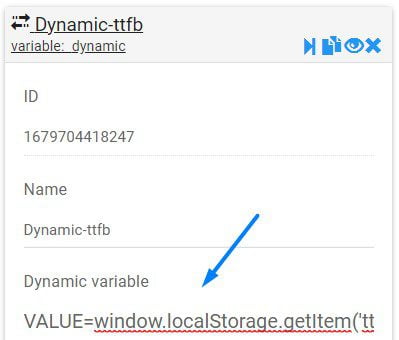
VALUE=window.localStorage.getItem('ttfb-value');Visualize Results in RTILA #
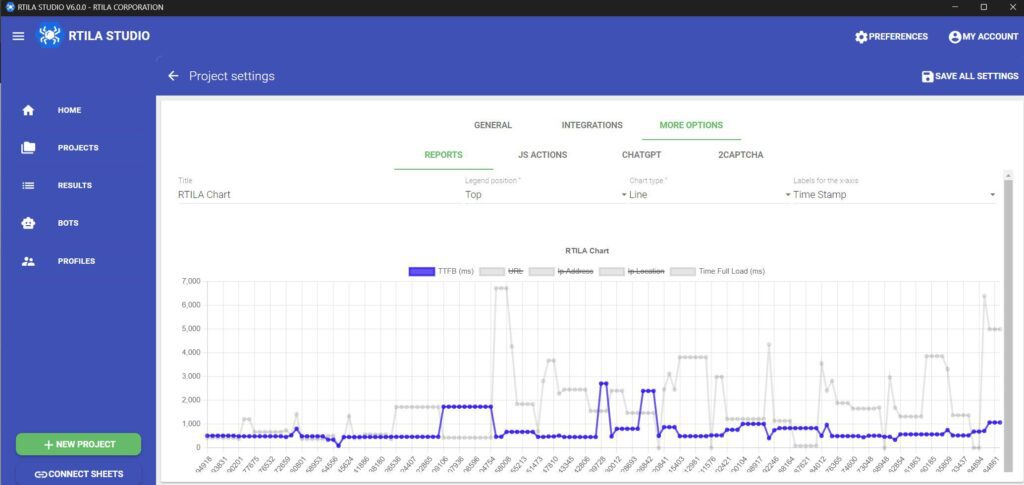
You can use our rudimentary but useful visualization tool which is in the Project settings, to have an illustration of the results of the Load test. You can see in dark blue the TTFB (Time To First Byte) and in grey the Fully Loaded Time (FLT) expressed in milliseconds (ms).
Export results to CSV File #
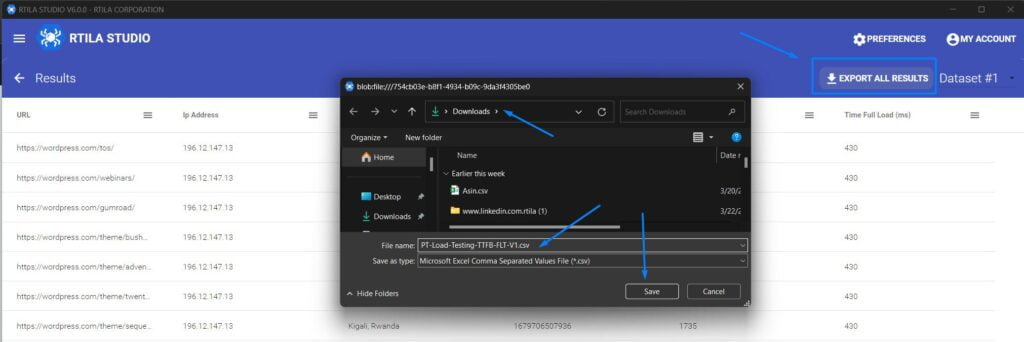
You can also export the load time results into a CSV file for further analysis and reporting, including using Power BI to create more advanced visual reports. To do so just go to the RESULTS TAB, click on PREVIEW & EXPORT

You will now see the table of results with a pagination option. And you can click on EXPORT ALL RESULTS, choose the location where you want to save this CSV file as well as the file name, then click save.
Download, edit, enhance and learn from this template #
You can find this Template in the Public Template section inside RTILA Studio (New Project > Public Templates) or you can download it from this link. You are free to use, edit, improve and reverse-learn from this template.