Installation #
- Download the Plugin
- Access Your WordPress Dashboard
- Navigate to the Plugins Section
- Upload the Plugin:
- Activate the Plugin
Configuration #
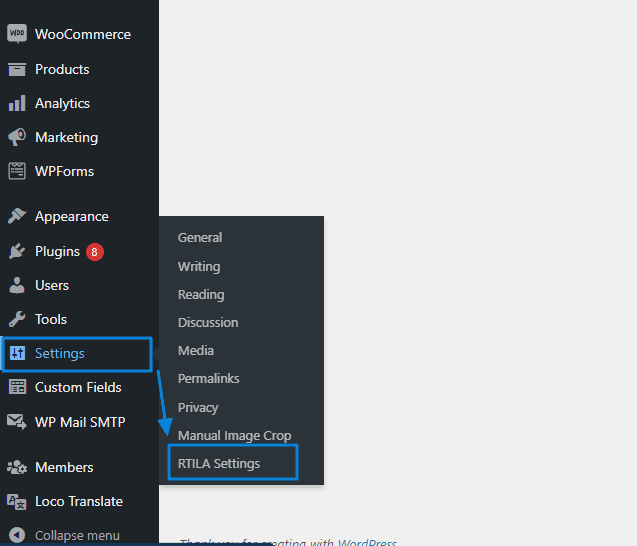
Once you have successfully activated the plugin, go to the admin menu labeled “Settings” and select “RTILA Settings“

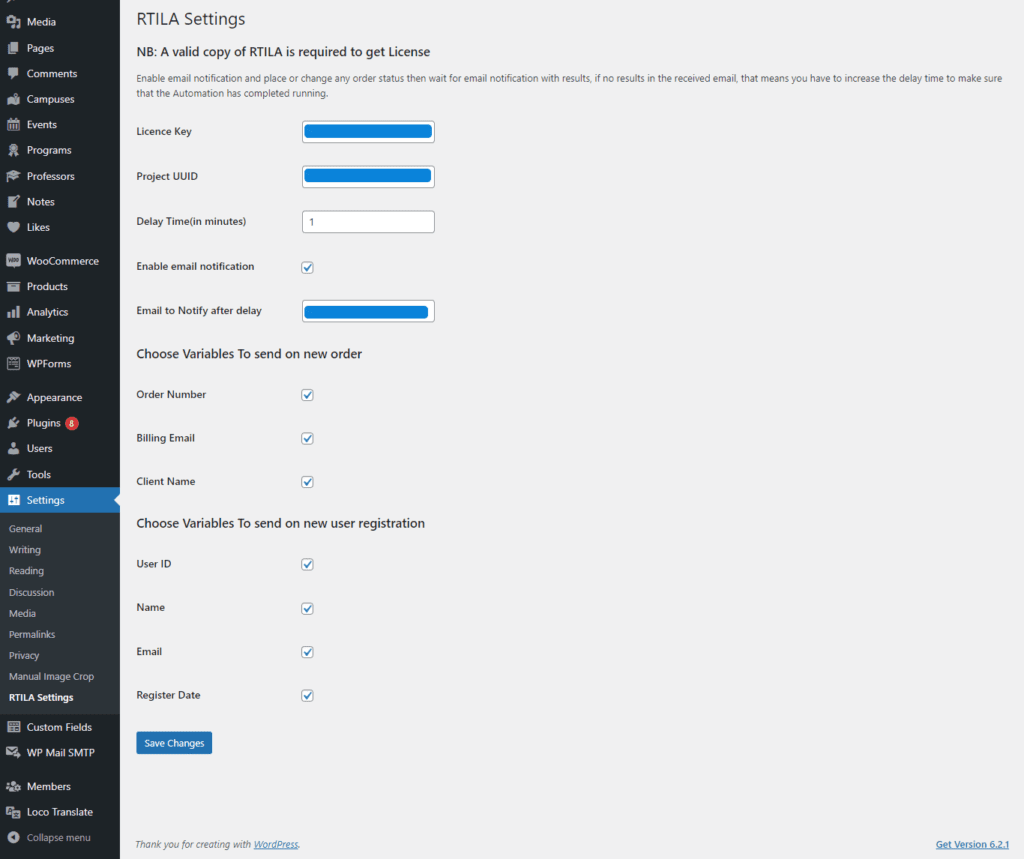
Here is RTILA Settings Page

- License Key: Valid RTILA License Key from your user account.
- Project UUID: UUID of the RTILA project you want to run when there is an new order or User Registration.
- Delay Time: How long should it wait to get the results, may vary depending on the time taken by the automation process to complete.
- Enable Email Notification: When enabled, you will get Notified after the Delay time with results, this allows you to determine if the set delay time is sufficient and if the automation process has been successfully completed.
- Email To Notify: In case you don’t specify an alternative email address for notification, the default behavior is to notify the admin email when the Email Notification feature is enabled.
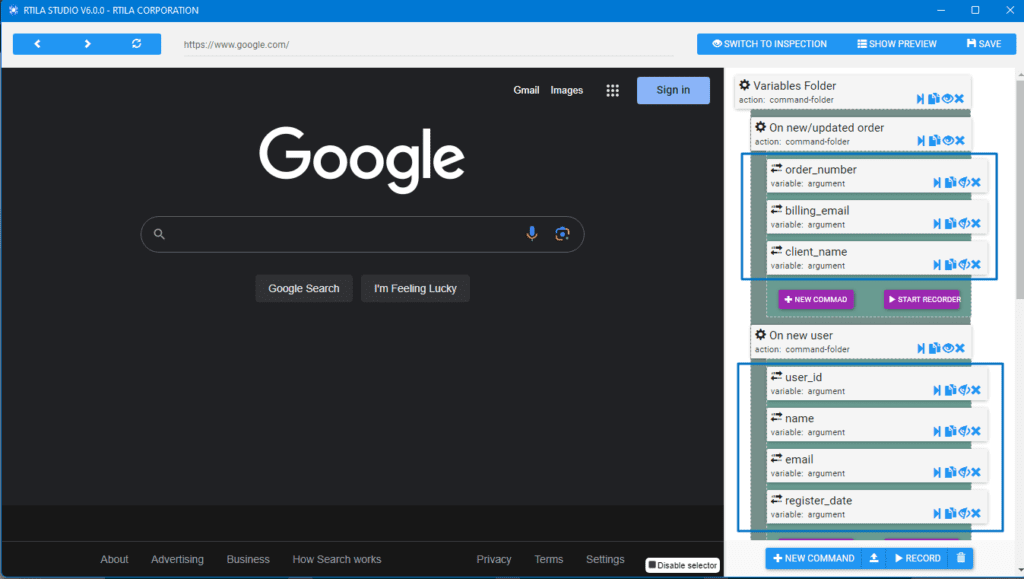
- Variables to send on a new order or new user registration: are available for access in the RTILA Automation Project. You need to declare them as Argument Variables within the project. Please refer to the provided image for further clarification.
